


Recently, I was assisting with the migration of a new managed services client to hosting provider, Armor. The migration is a custom data warehouse using standard products such as Oracle RDBMS, Essbase, and Oracle Data Integrator (ODI). After the installation and migration, I started reviewing the Essbase load rules and learned the rules were hard coded. Specifically, the load rules utilize Oracle RDBMS as a data source which is specified in the Oracle Call Interface (OCI) dialog box. OCI is an alternative to ODBC and improves interface time for both data and dimension builds. Using OCI is also advantageous because it does not require the creation of an ODBC data source, however, an Essbase variable can be utilized to specify the connection — this will be demonstrated in the tutorial.

Referencing a variable simplifies the migration process because the load rule does not change from environment to environment — only the variable does. In the circumstance of this particular migration, approximately 30 load rules required an update with subsequent testing and verification.
This tutorial will show you an installation of Oracle Database 11g Express Edition and the Essbase sample application database, Sample.Basic. The data source will be table, ACT1, which was created based on text file, ACT1.TXT, generated during the installation of the Essbase sample applications.
1. To begin the process, access Essbase Administrative Services “EAS.”

2. Access an Essbase server. Then from the menu bar select Actions > Create > Variable for …

3. Allow the “New Variable” dialog box to render. Next, write a variable name with the OCI connection which is in the format of host:port/oracle_service_name. Then select OK.

4. Select Essbase application database, Sample.Basic.

5. From the menu bar, select Actions > Create > Rules file for “Basic.”

6. From the menu bar, select File > Open SQL.

7. Select “OK” after the Select Data Source dialog box renders.

8. After the Open SQL Data Sources dialog box displays, select Oracle Call Interface (OCI) service name, then key “&OCI_EX.” Take note: the ampersand “&” is the Essbase identifier for a substitution variable and is following by the Essbase variable name.

9. Update the SQL statement by adding the appropriate: Select, From, and Where. Once this is done, select OK/Retrieve.

10. Key the appropriate Username, Password, then select OK.

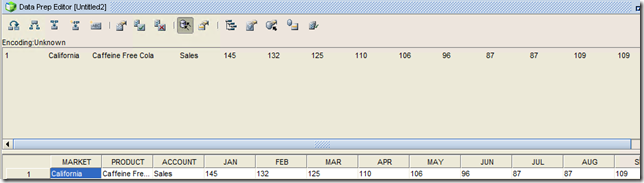
When your finished, this will allow data from the table to render in the Data Prep Editor.

The variable that has the OCI connection is updated for the environment and the load rules are migrated as is — simplifying and streamlining the process.
You might also be interested in...
