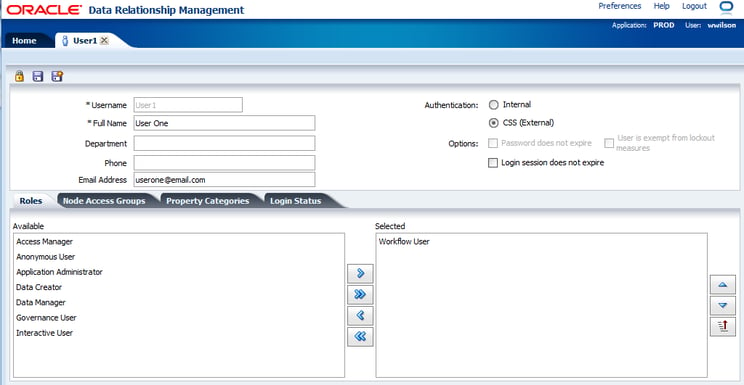
Recently, I was tasked with adding Users to DRM. The list contained almost 200 users! Inputting the users one-by-one was, in my opinion, not a viable option. Instead, I was able to save time by bulk inserting the users into DRM.
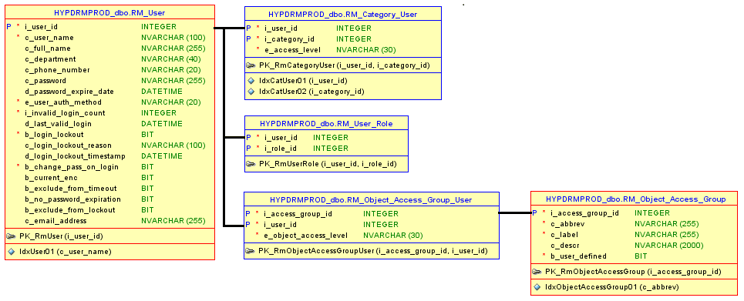
Bulk inserting DRM Users involves modifying/writing to back-end database tables. In addition to READ access to the DRM relational tables, you will also need WRITE access to the following six tables:
- RM_User
- RM_User_Role
- RM_Category_User
- RM_Object_Access_Group
- RM_Object_Access_Group_User
- DAL_Sequence
In the following example, users will be added to DRM with the “Workflow User” role.
Note: The below steps were used for an environment using MS SQL Server.
Step 1: Backup DB Tables
As a general rule of thumb, it is always a good idea to backup database tables before modifying them.
Step 2: Acquire Pertinent Pieces of Information
Because we will be inserting records into tables that contain primary keys and foreign keys, you will need to do a little detective work.
A. Determine the i_role_id key for the role you will be assigning to the users.
- Execute the following query:
Results:
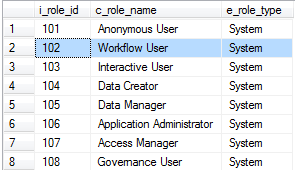
- i_role_id for “Workflow User” > 102
B. Determine the beginning number to assign to the i_user_id key for input into the RM_User table
- Execute the following query: SELECT MAX(i_user_id)+1 FROM RM_User
Results:
![]()
- MAX(i_user_id) + 1 > 362
C. Determine the beginning number to assign to the i_access_group_id key for input into the RM_Object_Access_Group table
- Execute the following query: SELECT MAX(i_access_group_id)+1 FROM RM_Object_Access_Group
- Results:
![]()
- MAX(i_access_group_id) + 1 > 316
Step 3: Create Data File for Import into the Following 5 Tables
I chose to create the data files for each table with specific fields in separate tabs within Excel, as shown below:
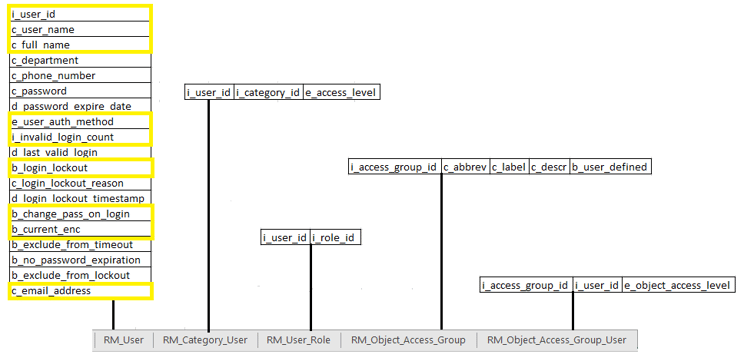
A. Populating RM_User data

- Not ALL fields in the RM_User table are required for each user record added. I got away with only inputting data into the above nine fields.
- The number sequence for the i_user_id field will begin with the value derived in Step 2B > MAX(i_user_id) + 1 > 362
B. Populating RM_Category_User data
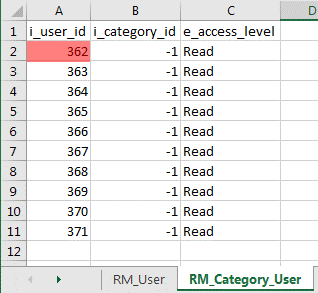
- In the environment I was working with, i_category_id = -1 represents System and the access level required for the users is Read. If different categories and access levels are required for your purposes, adjust the data to suit your needs.
- The number sequence for the i_user_id field will begin with the value derived in Step 2B > MAX(i_user_id) + 1 > 362
C. Populating RM_Object_Access_Group data
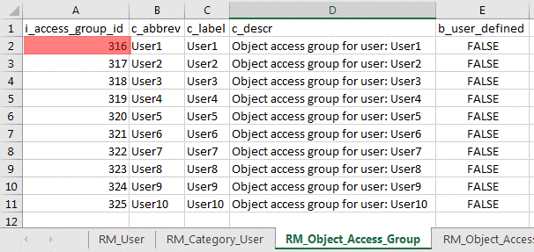
- The number sequence for the i_access_group_id field will begin with the value derived in Step 2C > MAX(i_access_group_id) + 1 > 316
D. Populating RM_Object_Access_Group_User data
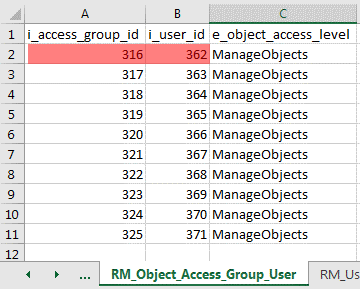
- The number sequence for the i_access_group_id field will begin with the value derived in Step 2C > MAX(i_access_group_id) + 1 > 316
- The number sequence for the i_user_id field will begin with the value derived in Step 2B > MAX(i_user_id) + 1 > 362
E. Populating RM_User_Role data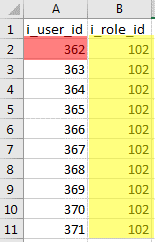
- The number sequence for the i_user_id field will begin with the value derived in Step 2B > MAX(i_user_id) + 1 > 362
- The i_role_id will be set for the value derived in Step 2A > i_role_id for “Workflow User” > 102
Step 4: Import/Insert the Prepared User Data from Previous Step into the DRM Tables
Leverage the Microsoft SQL Server Management Studio Import and Export Wizard.
A. Import the data for the RM_User and RM_Object_Access_Group tables first.
B. Import the data for the remaining 3 tables:
- RM_User_Role
- RM_Category_User
- RM_Object_Access_Group_User
Step 5: Reset Database Sequence Numbers
A. Determine the max i_user_id key in the RM_User table
- Execute the following query: SELECT MAX(i_user_id) FROM RM_User
- Results:
- MAX(i_user_id) > 371
- Execute the following query: SELECT MAX(i_access_group_id) FROM RM_Object_Access_Group
- Results:
![]()
- MAX(i_access_group_id) > 325
C. Execute the following update statements
- UPDATE DAL_SEQUENCE
SET i_id = 371
WHERE c_key = 'i_user_id'and c_primary_table = 'RM_User'
- UPDATE DAL_SEQUENCE
SET i_id = 325
WHERE c_key = 'i_access_group_id'
and c_primary_table = 'RM_Object_Access_Group'
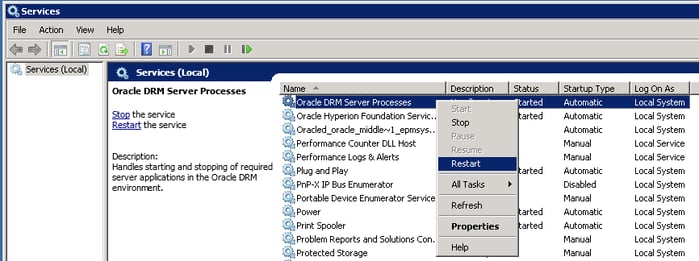
Step 6: Restart Oracle DRM Service
Step 7: Verify that Users Were Added Successfully
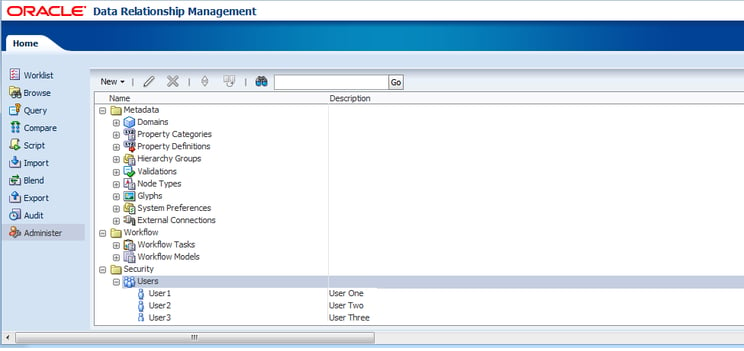
Step 8: Confirm User Roles Associated to Users are Correct
