


![PBCS Data Backup and Recovery Scenarios [Tutorial]](https://www.us-analytics.com/hubfs/PBCS%20Data%20Backup%20and%20Recovery%20Scenarios.jpg)
Recently, I created several types of backups and recovering methods using the applications snapshots, PBCS exports, and Essbase Data Export business rules to export and import data.
The application exports data in a formatted file in a way that another application can read it and use the data. This typically requires adjusting for naming conventions. We can do this in SQL and in FDMEE. If it’s straightforward — like for recovering data or for migrating data into a different environment — then the Essbase data export will work. The PBCS data export will also work if we’re looking for a non-technical approach. These methods enable the two systems to share the same data.
In searching for the best method, I’ve found a few different options. In this blog post, I’ll show you the business case for PBCS data backup and recovery, along with how to execute several of these techniques.
What are the business cases?
You should always have a disaster recovery and business continuity plan, and there’s always good reasons to back up your data for recovery purposes. I generally back this up on a hosted environment like AWS. Sometimes during implementation, I will back up to a secondary location, but this is generally not needed since we can recover from an AWS server if something unexpected happens or we need to carry larger amounts of data.
Other business cases for PBCS backup and recovery include…
- Exporting to other systems – This sends data to an account reconciliation system like Oracle ARCS. There's also a need to import journal entries and statistics from PBCS to the general ledger (GL) support Oracle’s fusion (Oracle ERP Cloud).
- Data Migration from Production to Test for testing purposes.
- I have come into situations where we need to back up data for specific time periods for scenarios, versions, specific business units — and sometimes very specific accounts while we test and calculate the model. This is to have a safety net while we test so we can recover in minutes, not hours. And we want to protect that specific type of data and make it easy for the Administrator and Power User to import data back in, first clearing and then importing.
- Exporting data using ASO exports directly from the cube in case there are additional pieces of data not in your main BSO application. You may want to take exports of that to surgically recover user inputs.
Introduction to Exporting Data in PBCS
Exporting data from PBCS already transforms data in a formatted way, which can be easily loaded by another information system or the same application in recovery scenario or application migration.
The PBCS method to export and import data via the PBCS interface is relatively quick and easy. It requires very little technical knowledge.
The export and import method explained below uses the Essbase Data Export as a business rule. The Data Export is automated using the PowerShell and EPM Automate scripts. I’ll help explain how this works in the context of how to best meet a client’s business requirements along with Oracle’s software options.
Minor Data Loss can be restored using Smart View, restores from a backup of a data export file with specific data “carved out,” or reloaded using Data Management. Minor data loss is for only when specific data is required to be restored like for a specific month and entity. Then all other data from the original data export can be deleted from the import file to restore only this specific data.
Data exports, using the DataExport commands, are automated from the PowerShell script and executed using an EPM Automate command. Data Exports are setup to use the Essbase DataExport command. The data exports are in the txt extension file and then compressed as a zip file.
Performance considerations
Recently, I’ve run into performance issues with exporting data using the PBCS data export method. Typically, this is the most straight forward part an implementation, which is exporting data from the level 0 base data out of PBCS.
The performance issues came when using the PBCS Export Data Job. The example below will show the export times ballooned to one and a half hours. I was able to reduce it back to 15 seconds in a single test, using the same data set.
I found that when exporting four years of production data around one hour and 45 minutes using PBCS exports, we can reduce the time to 15 seconds using data export option settings + fix loop statement. This way, the data export command doesn’t lock users out of the system which the PBCS exports to.
Below, I’ll share the various methods and settings, along with their pros and cons.
Method No. 1 - PBCS Export Data Jobs
Data can be exported using the export data option in PBCS under Application Overview in the Actions button. Previously, we would create PBCS export data jobs to export data. But we started having issues over time. Subsequently, we are no longer using the PBCS exports for the following reasons.
Pros:
- The export data process using the PBCS method is relatively quick and easy to setup out of the box.
- The data is exported as a zip file. It can be reloaded as a zip file easily.
- Nightly backup of the data.
Cons:
- Heavily menu driven to setup, too many clicks to choose all the options.
- Locks users out when it runs.
- Cannot export dynamic calc members.
- Substitution Variables not currently supported. I assume this will change in the future.
- They are slower in performance. The PBCS export data jobs had performance issues with each of the jobs for all data, actual data, and forecast data. The export times ballooned to one and a half hours for the all data export. We were able to reduce it down to 15 seconds in a single test using the Data Export business rule. We were able to find when exporting four years of production data around one hour and 45 minutes using PBCS exports that we can reduce the time to 15 seconds using data export.
- The text file format is difficult to put into Smart View, relational database, or any other system or tool.
Launching the PBCS Export Data Jobs
Even after reviewing the pros and cons it may still fit your need. Here’s how to export data using the PBCS option.
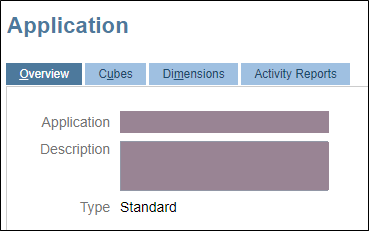
Go to the Home page > Application > Overview

Within the Application tile and in the Overview tab, open the Exports tab on the right-hand side and follow the steps.
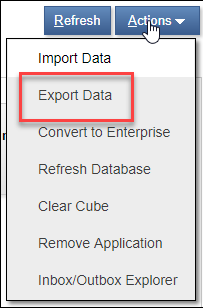
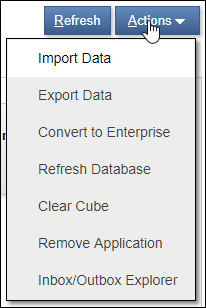
On the right side, select Actions > Export Data

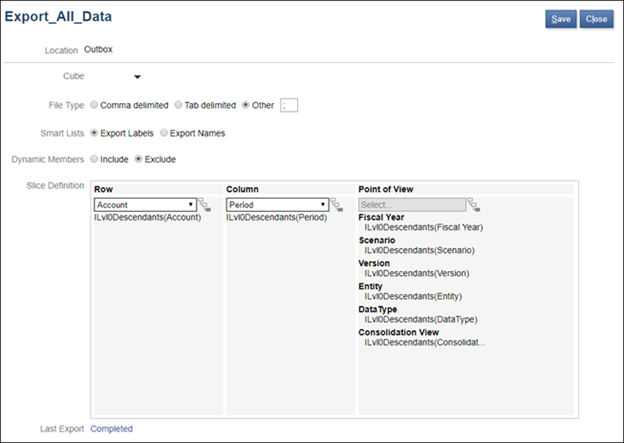
To edit, click on the hyperlink and review the data export.
The export is set to all level 0 data. This gets exported every night as a backup of the data.
For the settings, set to Outbox. In EPM Automate, download this. The cube is the plan type to export from. The file type is delimit by semi-colon. This can be commas, tab, or any other letter. The key here is to pick a character delimited not in the member names or aliases. (Or you can restrict the names and aliases is to not have commas in the name which the comma delimiter is default, and you can use that period.)
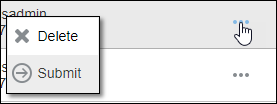
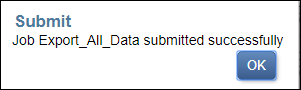
Run by submitting.
Within the Jobs tile, the process activity for this will show.
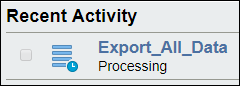

This is the export — it takes the 2 hours.
Automating PBCS Export Data Job
Below I’ll show you how to do the PBCS export data job using EPM Automate and PowerShell script.
|
#Login to EPM Automate |
This script automates and schedules the export of the data, download of the data, and then renames the data file and moves to the archive folder.
This method takes two hours for the entire database that I’m using. Your own performance, of course, will vary. But it's not efficient and it takes time.
|
#Export data #Download Level 0 File data "$(Get_TimeStamp) Move Data Export to $pbcsArchivePath\ " >> $EPMAutomateLog |
Method No.2 – Data Export business rule
Compared to the PBCS export, exporting data using the Essbase data format is faster and has more options and flexibility, including…
- This data export business rule method is the same as on-prem, except this is exported to the PBCS cloud in the Inbox/Outbox Explorer.
- This does not lock out users in its entirety from using the system, it only locks one cell at a time.
- The data exports will be directed to /u03/lcm/. This is the Inbox.
- With fix statements, specific data can be used to focus the export on areas like actuals, forecast, or projections. But it doesn’t fix on all dimensions if we don’t need to. The SET data export options will take care of some of this with level 0 and only exporting where there are data blocks.
- Substitution Variables can be used, unlike PBCS export data option.
How to manually export data and download:
- Launch one of the business rules for exporting data.
- Go to Inbox/Outbox Explorer in PBCS.
- Download the txt file to your local machine.
Export data (automated)
- The PowerShell/EPM Automate script launches the business rules and downloads the files automatically to a hosted server on a schedule.
- The files can be compressed and zipped together.
Launching Data Export business rule
Log into PBCS and open the Rules so you can view what you’re exporting. Of course, we can always launch the rule from the “Simple Interface.”
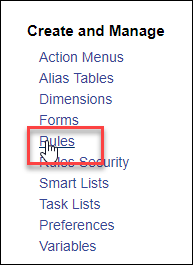
To create the rule, go to the Planning node.

Open the rule.
The first section will have Data Export Options. The export does not have a FIX loop statement because it will export all the data with blocks, which is more efficient.
Launch the business rule.

This finishes in a few seconds.
The Main idea here is the export runs in 30 minutes for all data from the two hours using data export function in PBCS.
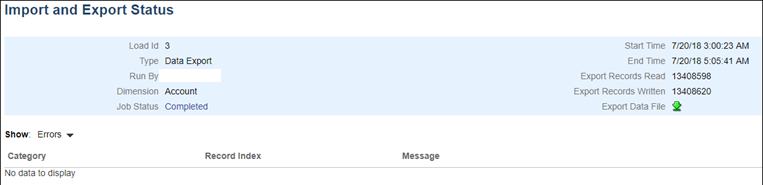
These are the start and end times. It runs in about 30 minutes.

The Essbase data export without specifying all the dimensions in the Fix loop, in conjunction with the DataExportLevel setting of Level0, speeds up the export. The Fix statement is used to filter on the members like years or scenario and the level0 setting exports only where there are data blocks in Essbase.
Creating the Data Export business rule
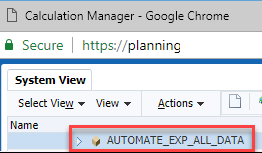
For the nightly backup process, the business rules called AUTOMATE_EXP_ALL_DATA is executed to backup all the data. The nightly backup process is designed to backup everything from the level 0 data using this business rule to the Application Snapshot. We also backup the all data export at level 0 so we can surgically recover data. Calculation exports lock one block at a time so this can also be done during the day.
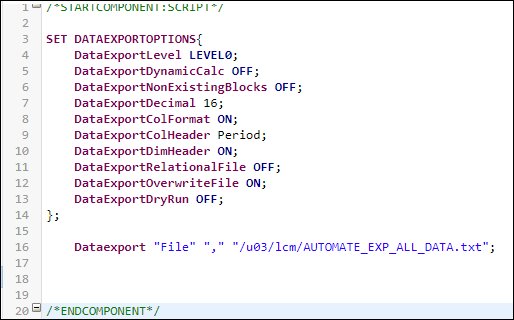
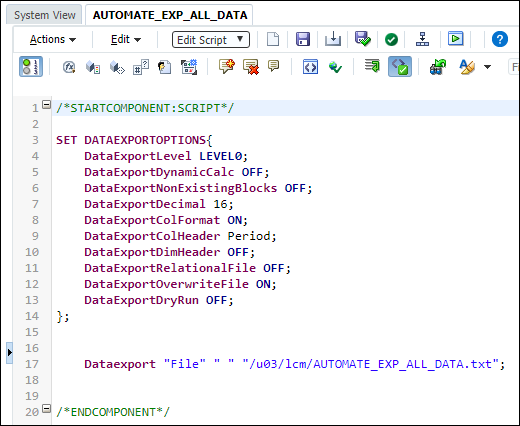
The AUTOMATE_EXP_ALL_DATA business rule is designed to export all data. AUTOMATE_EXP_ALL_DATA has the following DataExportOptions settings:
- DataExportLevel is set to Level0. This setting will allow Level 0 data to be exported along with only where there are blocks created in Essbase.
- DataExportDynamicCalc is set to OFF. This will export only stored data.
- DataExportNonExistingBlocks is set to OFF.
- DataExportDecimal is set to 16 positions.
- DataExportPrecision is not used as DataExportDecimal – it supersedes the DataExportPrecision setting.
- DataExportColFormat is set to ON. This will repeat the rows the dimension names to allow to easily reload using Smart View.
- DataExportColHeader specifies the dimension Period.
- DataExportDimHeader is OFF for importing data using PBCS.
- DataExportRelationalFile is set to OFF because we are using the column header and missing character are set to #MISSING (#MI).
- DataExportOverwriteFile is ON.
- DataExportDryRun is OFF.
DATAEXPORT command: DATAEXPORT "File" "delimiter" "fileName" "missingChar"
- File is used for PBCS.
- The delimiter must be tab. We can use this by hitting the tab key on your keyboard between the double quotes, " ".
- The file name and path is /u03/lcm/AUTOMATE_EXP_ALL_DATA.txt.
- The missing character is defaulted to #MISSING.
Dataexport "File" " " "/u03/lcm/AUTOMATE_EXP_ALL_DATA.txt";
The results are stored in the directory called /u03/lcm/ on the Oracle Cloud for PBCS. The name is set to AUTOMATE_EXP_ALL_DATA.txt.
The file as an example format.

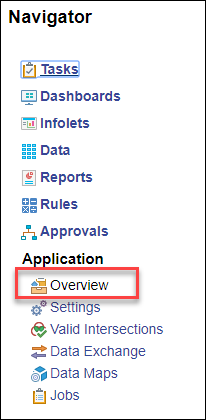
To access this file, start with going to the Application tile.

Select Overview.

Select the Inbox/Outbox Explorer.

In the Inbox/Outbox Explorer, the exports are currently called AUTOMATE_EXP_ALL_DATA.txt and AUTOMATE_EXP_ALL_DATA_1.txt. Essbase creates additional data export files when they reach 2GB+ in size.
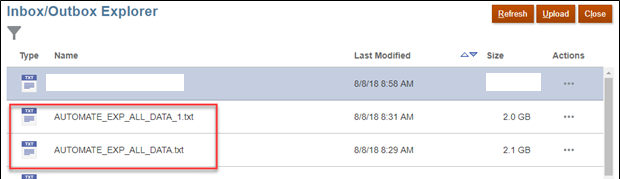
In the PowerShell scripts, a loop statement was added to download all the data exports using the same prefix name (i.e. AUTOMATE_EXP_ALL_DATA, AUTOMATE_EXP_ALL_DATA_1, AUTOMATE_EXP_ALL_DATA_2, etc.). When the exported data exceeds 2 GB, Essbase creates additional export files, as needed. An underscore and number are appended to the file names of the additional files, starting with _1.
This is set up to download the AUTOMATE_EXP_ALL_DATA files in the Download_Application_Snapshot.ps1. And it will download AUTOMATE_EXP_ACTUAL and AUTOMATE_EXP_PROJ in the Execute_PBCS_Export_Data.ps1. And it will accumulate all the additional export data files into one zip file. This will also create a list of all the files in the PBCS called ListFiles.log; the PowerShell code uses it to find all the files to download with this name.

Create PowerShell logic to download and archive incremental Essbase data export files
Pro Tip: I added a loop statement in the PowerShell scripts to download all the data exports using the same beginning name (i.e. FILENAME, FILENAME_1, FILENAME_2, etc.).
Because Essbase creates additional data export files when they reach 2GB+ in size, this will loop through all the export names.
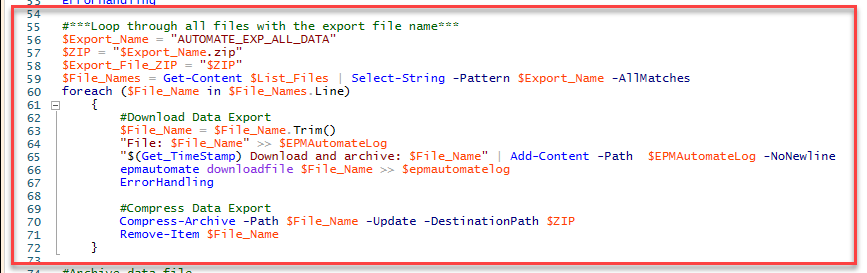
I’ve set it up to download the FILENAME files in the Download_Application_Snapshot.ps1. It will accumulate all the additional text files into one zip file. This will also create a list of all the files in the PBCS called ListFiles.log; the code uses it to find all the files to download with this name.
|
#Login to EPM Automate #***Loop through all files with the export file name*** #Export data export $List_Name = "ListFiles" #Compress Data Export #Archive data file #Logout from EPM Automate #Purge Files # End the log file and send Email to Admins with attachments |
This is the compressed export for all data.

Now it contains both export FILENAME and FILENAME_1.

Steps to importing data
The data import step is a manual process. The specific data records to import and restore are done on a case-by-case basis.
Using the txt file, go to import data in the Application tile > Overview tile > Actions > Import Data.
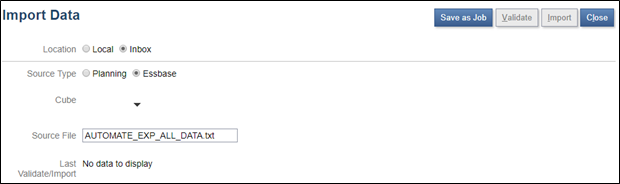
- If you want to import the most recent data file created in the Inbox or recently uploaded, then import the data using Inbox option. You’ll have to create a Job after selecting all the options and text file to import. Select Inbox. Select Essbase as the Source Type (which is the format of the file). Select the cube which is the Essbase database. Type in the name of the file with extension .txt (FILENAME.txt) in the text box. The valid file formats are .csv, .xlsx, .txt, .zip.
- If you want to import the file from your hard drive (it could be a file already downloaded from a previous day/time), you can upload the text file to the Inbox and import using the Inbox option. I recommend uploading first and importing using the inbox option if the file is large. To do this…
- Select Local
- Select Essbase as a Source Type
- Select APP cube
- Select the Source File from your local drive, and once selected it will upload the file.
- Import button with validate and import the data.
- If you can also import the data from Local, this option can be done without creating and the job will upload and import the data in one time.
To import PBCS from the home page, go to Application > Overview.
Within the Application tile and in the Overview tab, the next steps are to open the Exports tab which is on the right-hand side. Then follow the steps.

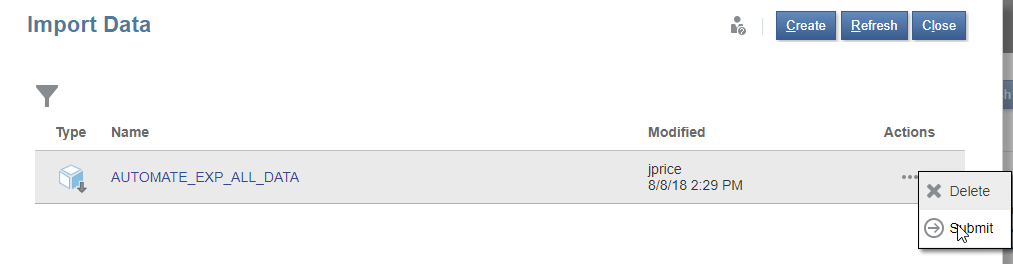
On the right side, select Actions to Import Data.
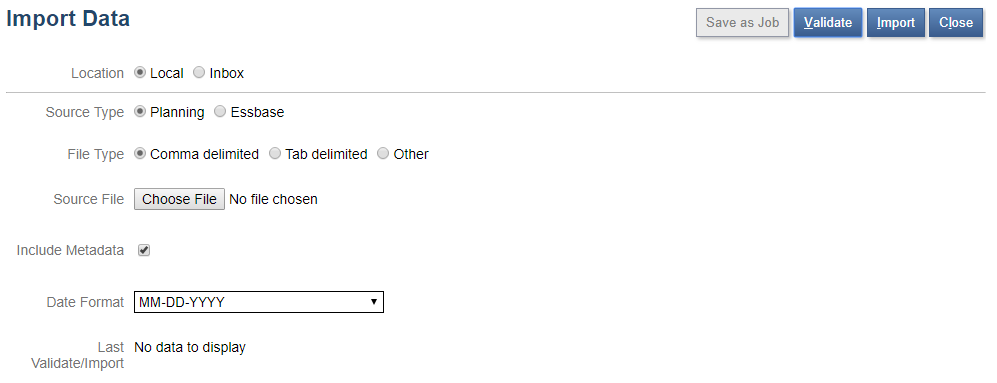
Select Create.

By default, these are the settings.
Set the Import Data job for Inbox in the location. I recommend this when the size of the file is large. Select Essbase as the source type. Select APP. And type in the AUTO_EXP_ALL_DATA.txt as the source file.
Save as a job.
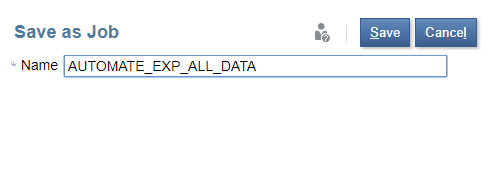
Job is saved.
This now can be executed (submitted).
Conclusion
For major and minor data loss and recovery, I recommend using the DataExport business rule to export the data. This can run in seconds and have very little to no impact to the end user due to speed and how it only locks one cell at a time and not the entire database. Because of the speed and ease of use, we can capture data more frequently on an intraday basis. We can use substitution variables, and we can have specific data export files “carved out” to make the recovery process easy.
You might also be interested in…
