During the installation and configuration of Financial Data Quality Management Enterprise Edition (FDMEE), the Oracle Data Integrator (ODI) master repository and agent are installed with a default username of SUPERVISOR and SUNOPSIS. Securing the Oracle Hyperion EPM environment by changing the SUPERVISOR password is not a single step but requires changes in three separate interfaces: FDMEE, ODI Studio Console, and WebLogic / Oracle Enterprise Manager.

This post will proceed with version 11.1.2.4 of Oracle EPM installed on Windows Server 2012 R2. The steps for 11.1.2.3.X of EPM are the same except for Operating System differences.
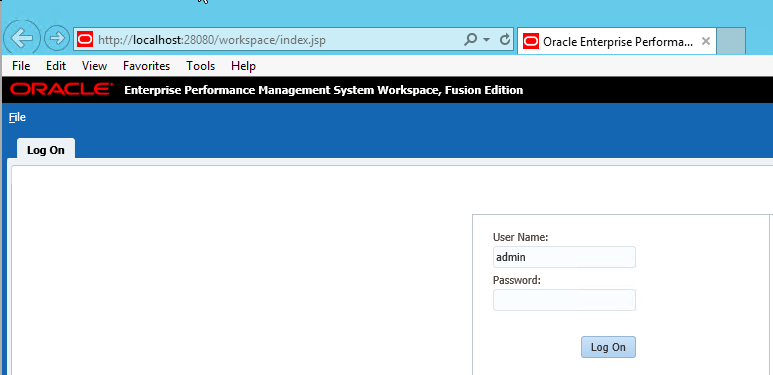
1. Log into Workspace.
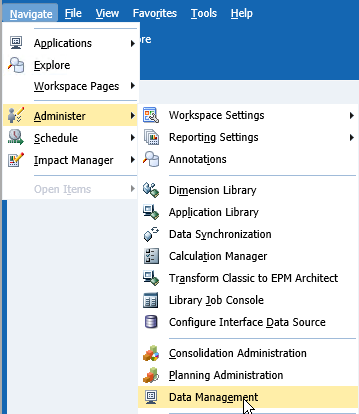
2. Navigate –> Administer –> Data Management.
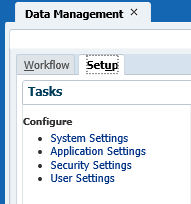
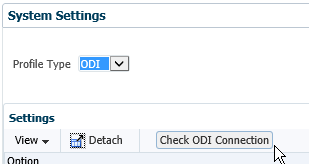
3. Select the Setup tab and then System Settings.
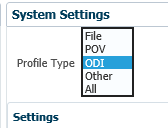
4. Select ODI from the Profile drop down.
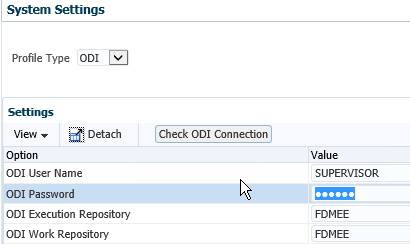
5. Key the new ODI password for User Name SUPERVISOR and then select Save.
6. After a successful Save, the message “Your changes have been saved” will display.

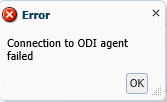
7. To verify the ODI SUPERVISOR password has changed, select “Check ODI Connection," which will display an Error. Select OK to close the error.

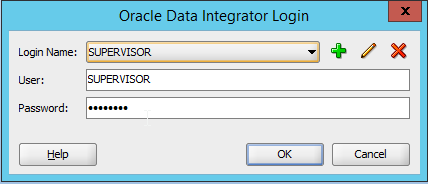
8. Select ODI Studio from Apps By Name.

9. Key the User “SUPERVISOR” and the Password “SUNOPSIS,” and then select OK.
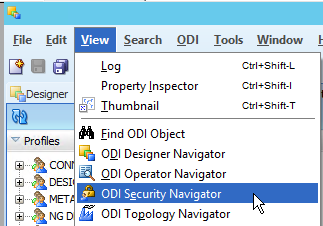
10. Select View –> ODI Security Navigator.
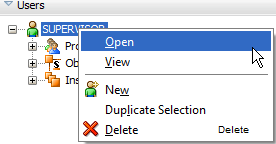
11. Select Users –> Supervisor then right click and choose Open.
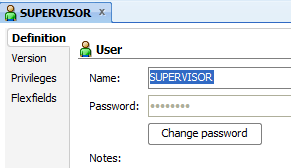
12. Select Change password.
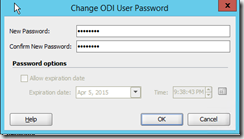
13. Key the New Password and then select OK.
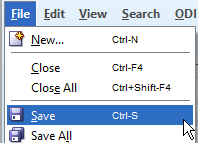
14. Select File –> Save.
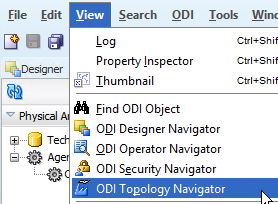
15. Select View –> ODI Topology Navigator.

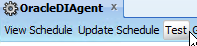
16. Select Agents –> OracleDIAgent and then double click OracleDIAgent.

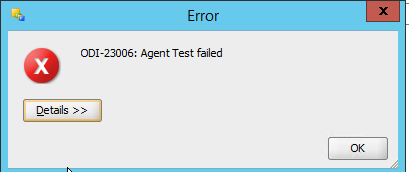
17. Select Test, which will generate an error. This verifies the password has changed. Select OK to close the Error dialog box.
18. Select Start Admin Server for WebLogic Server Domain from Apps By Name.

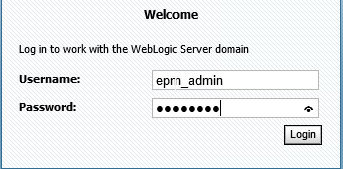
19. Once the Admin Server has started, select Admin Server Console from Apps By Name.

20. Key the WebLogic Username and Password created during installation and then select Login.
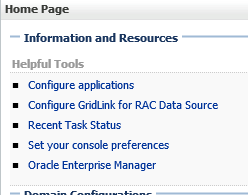
21. Select Oracle Enterprise Manager from Helpful Tools.
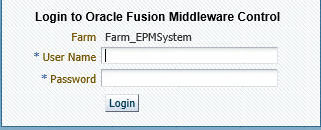
22. Key the WebLogic User Name and Password created during installation and then select Login.
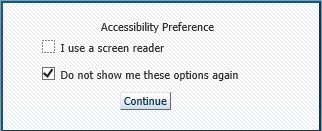
23. If the Accessibility Preference dialog box appears, update if needed (the default is displayed below) and then select Continue.
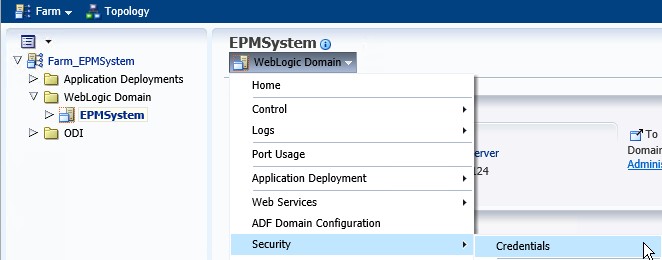
24. Select and expand WebLogic Domain.
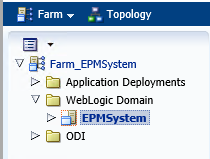
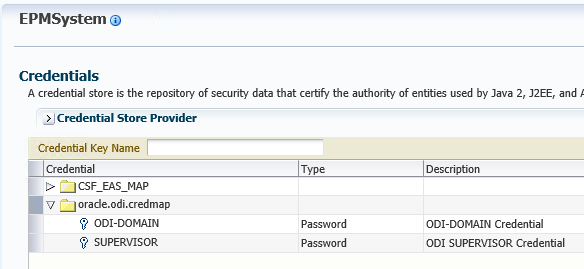
25. Select EPMSystem –> WebLogic Domain –> Security –> Credentials.
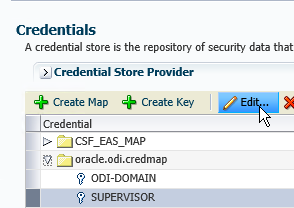
26. Expand and select oracle.odi.credmap –> SUPERVISOR.
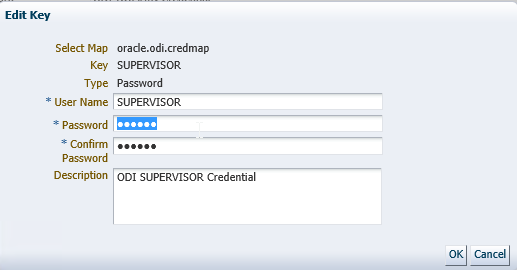
27. With SUPERVISOR selected, click Edit.
28. Key the updated password and then select OK.
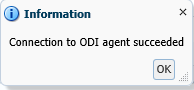
29. Return to FDMEE –> System Settings –> ODI and select Check ODI Connection, which will display a successful test of the ODI agent.
30. Return to ODI Console and select ODI –> Disconnect “SUPERVISOR.”
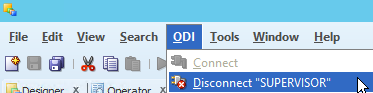
31. Select ODI Connect.

32. Key the User “SUPERVISOR” and Password “Updated One,” and then select OK.

33. Select View –> ODI Topology Navigator.
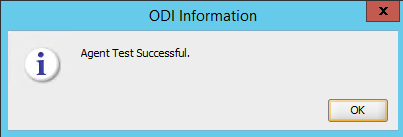
34. Select Agents –> OracleDIAgent and then double click OracleDIAgent.

35. Select Test, which will generate an Agent Test Successful dialog box. Select OK to close the dialog box.